

There are many ways to get more people to download your app. One great way is to create a landing page specifically for your app. This will allow you to focus all of your attention on getting people to download your app, and you can track the results much more easily than if you were just relying on ads or word-of-mouth. In this blog post, we will teach you how to create a landing page for your app that will help you get more app downloads!
What is a landing page and why do you need one to get more app downloads?
An app landing page is a specific web page that is designed for one purpose: to get more app downloads. It is different from other pages on your website because it is focused solely on conversion, and it usually has a very specific call-to-action (CTA). Creating a landing page for your app can be a great way to get more app downloads because it allows you to focus all of your attention on one specific goal.
You can also track the results much more easily than if you were relying on ads or word-of-mouth. There are many different ways to set up a landing page for your app, but in this blog post, we will focus on how to do it using the WordPress platform and the Divi theme by Elegant Themes.
Set up your domain and email with Namecheap
The first thing you need to do is purchase a domain name and set up email hosting. You can do this through a company like Namecheap, which offers both domain names and email hosting for amazing prices and top-tier customer service. You only need to purchase the domain and a “private email” plan (depending on the number of email accounts you want set up).
Once you have purchased your domain name and email plan, you can begin setting up your private email accounts. The process is fairly straightforward and well-documented on the Namecheap website.
Set up your cloud hosting with Cloudways
Now that you have your domain name and email set up, you need to find a place to host your landing page. We recommend using a cloud hosting provider like Cloudways, which offers superior high-performance WordPress cloud hosting. Cloudways is a great option for hosting your landing page because it offers a pay-as-you-go pricing model, which means you only have to pay for the resources you use.
It also offers a wide variety of features, including free SSL certificates, automatic backups, and Cloudflare CDN integration. This makes your landing page load faster and helps improve your conversion rate.
Create a Cloudways account and set up your server
To get started with Cloudways, you first need to create an account and select your desired hosting plan. I use the Vultr servers for all of my websites, but you can choose from a variety of server providers like Amazon Web Services or Digital Ocean.
Once you have selected your server provider, hosting storage space, and plan, you will need to select a data center location. I recommend choosing the location that is closest to the majority of your users.
Set up your WordPress Application
The next step is to set up your WordPress application. You can choose the latest version of WordPress, a multisite version of WordPress, a “Clean” version of WordPress that doesn’t include any optimizations, a Woocommerce version (for selling products on your site), a PHP option, a Laravel option, and a Magento option.
Since we want a WordPress landing page that’s optimized for speed and we’re not selling products, we’ll select the first option. Then set a name for your application and click the Add Application button. Creating a new application will take a few minutes.
Connect your hosting to your domain
Once the application has been created, copy the IP address of the application under the “Access Details” tab of the application and head back over to Namecheap. Click on the “Manage” button next to your domain name and select the “Advanced DNS” tab. Create a new A record with a “@” host (or your root domain name) and paste the IP address of your Cloudways application.
If you have another A record in the DNS, delete it. Also, add a CNAME record with www as the host and @ (or your root domain name) as the value. Leave the TTL at the default value and click on the “Add Record” button. Now, whenever someone enters your domain name into their browser, they will be redirected to your Cloudways application.
Now jump back into Cloudways and click on the “Domain Management” tab for your application. For the “Primary Domain” field, it’s best to enter your website with the www subdomain. In the additional domains, you can add your root domain without a subdomain. Like this:

Set up your SSL Certificate
After the domain has been pointed to the new Cloudways application, you need to set up the SSL certificate. Click on the “SSL Certificate” tab and then click on the “Let’s Encrypt” button. Enter your email address and select the “I agree to the terms of service” option. Then click on the “Install Certificate” button. If you’ve selected the “Wildcard” option, you’ll need to add another CNAME record to your DNS settings in Namecheap.
This process will take about 10 minutes to complete. Now that your domain name is set up and your Cloudways application is ready, it’s time to start creating your landing page!
Setting up your WordPress environment
Head over to your Cloudways application’s “Access Details” tab. Click on the URL under Admin Panel. This is the link to your WordPress admin dashboard. Copy and paste the username and password from that same Admin Panel tab into the login fields. WordPress is a platform that is comprised of a theme, plugins, and pages.
There are a lot of extra features that you will not need for your landing page, so we’ll be keeping it as simple as possible. Start by going through all of the pages under the “Settings” tab first to ensure that you have everything configured the way that you want it. Next, take a look at the “Appearance” tab. This is where you can change the look and feel of your website by installing themes and customizing them to match your brand.
For a landing page, I recommend choosing a theme that is simple and easy to use. The Divi theme by Elegant Themes is my personal favorite, but there are a lot of other great themes out there as well.
Once you’ve selected and installed your theme, take some time to familiarize yourself with the options that are available to you. Most themes will have a settings page where you can change things like the color scheme, font size, and layout of your website. You can find the Divi theme settings under the “Divi” tab after you’ve purchased, installed, and activated it.
Integrating Google Analytics and Google Search Console to track if you get more app downloads
Before jumping in to design the landing page, we also need to set up the integrations for Google Analytics and Google Search console. These are two tools that will be essential for tracking your website’s traffic and performance.
Set up Google Analytics
Google Analytics is a free service that allows you to track the number of visitors to your website, as well as their location, the pages they visit, how long they stay on each page, and more.
To set up Google Analytics, head over to your Cloudways application’s “Access Details” tab. Copy the domain of your website and add it to your Google Analytics account. You’ll need to add a DNS record to verify ownership of the domain.
Set up Google Search Console
Google Search Console is a free service that allows you to track how your website appears in Google search results. This is important because it allows you to see which keywords people are using to find your website, as well as the click-through rate (CTR) for each keyword.
To set up Google Search Console, head over to your Cloudways application’s “Domain Management” tab. Copy the Primary Domain name and add it to your Google Search Console account. You’ll also need to add a DNS record for the search console to verify ownership of the domain.
Install the Analytify plugin
Analytify is a free plugin that allows you to view your Google Analytics data directly from your WordPress dashboard. This is a great way to keep track of your website’s traffic without having to log in to Google Analytics every time. To install the Analytify plugin, head over to the “Plugins” tab in your WordPress dashboard and search for “Analytify”. Install and activate the plugin.
Once it’s activated, you’ll need to connect Analytify to Google Analytics and Search Console.
Create a “onelink” link for device detection
A “onelink” link is a special type of link that allows you to redirect visitors to different pages based on the device they’re using. This is important because you’ll want to send visitors to the appropriate page for their device (i.e. an iPhone user should be sent to the App Store, while an Android user should be sent to Google Play).
To create a “onelink” link, head over to https://www.onelink.to/ and create an account. Once you’re logged in, click on the “Create Link” button. Enter the URL of your app’s app store links and a fallback link. I usually use the app’s “Share” PWA link as a fallback link.

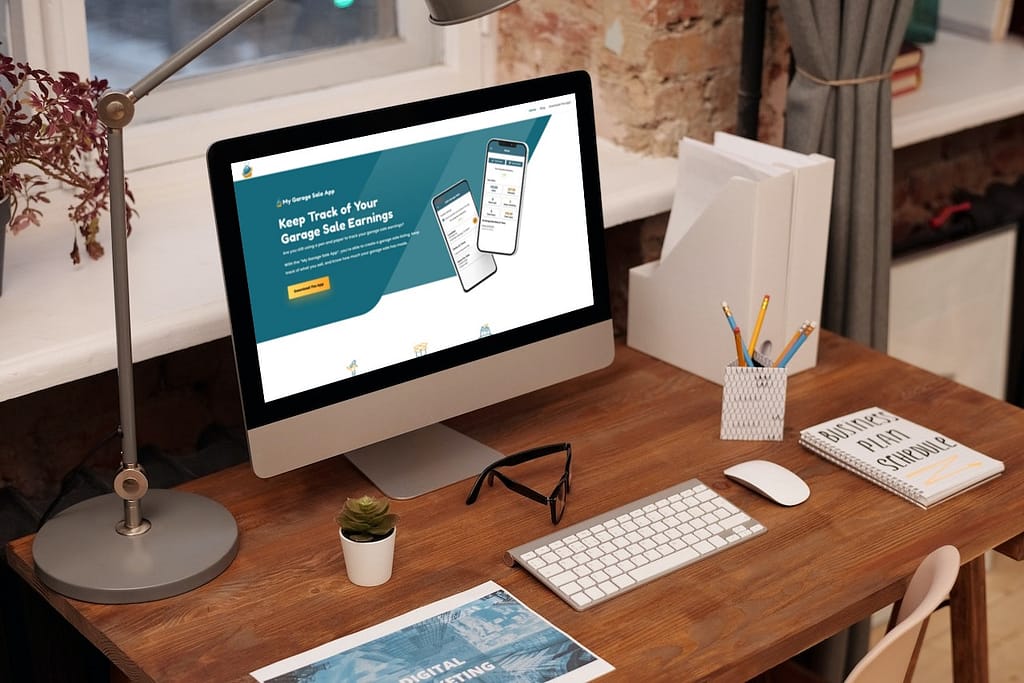
You can even set a custom URL slug for your onelink’s link. This example for the “My Garage Sale App” is https://onelink.to/mygaragesaleapp. We’ll need this link when designing the landing page.
Design your landing page to get more app downloads
It’s time to start designing your landing page so that you can get more app downloads. Head over to your WordPress admin dashboard and click on the “Pages > All Pages” tab. This is where you’ll find all of the pages on your website.
The default WordPress installation starts with a Sample Page and a Privacy Policy page. We’ll be creating a new page for our landing page. Delete the Sample Page by hovering over the page’s title and clicking the “move to trash” option. Since we’re creating a brand new landing page, click on the “Add New” button to create a new page.
Give your page a title (I like to use the name of my app) and then click the “Enable Divi Builder” button. This will allow us to use the Divi Builder, which is a visual drag-and-drop page builder. If you’re not familiar with the Divi Builder, don’t worry! It’s very easy to use and there are plenty of resources available to help you get started.
Once you’ve enabled the Divi Builder, you’ll see a pop-up asking if you want to start with a blank page, use a premade template, or use a page that you’ve already created. Feel free to browse the premade templates, but we’ll be starting with a blank page for this tutorial.
Click on the “Use Blank Page” option and then click the “Start Building” button. You should now see a blank canvas where you can start designing your landing page. The first thing you’ll need to do is add a “Section” to your page. A section is a container that holds one or more “Rows”. You can think of it as the foundation for your page. To add a section, click on the “+” icon and then select the “Section” option.
Next, we’ll need to add a row to our section. A row is a horizontal container that holds one or more “Modules”. Modules are the individual elements that make up your page, such as text, images, forms, etc. To add a row, click on the “+” icon and then select the “Row” option.
Now that we have our section and row in place, we can start adding modules to our row. The first module we’ll add is a “Text” module. This module allows us to add text to our page. To add a Text module, click on the “+” icon and then select the “Text” option. The Text module should now be added to your row. In the content editor, you can enter the text that you want to display on your landing page. Start with a powerful headline and an introduction paragraph that quickly and clearly explains what your app does.
It’s also a good idea to include a call-to-action (CTA) button that encourages visitors to download your app. Set the link on your button to the Onelink link that we created in the previous steps. So whenever someone clicks the button, Onelink will detect their device and send them to the proper app store based on their device.
Add more sections to explain what your app does, show off some screenshots, and list some of your app’s features. Be sure to include CTAs throughout your landing page to encourage visitors to download your app. It’s also a brilliant idea to include trust signals like testimonials, customer logos, or reviews to help increase conversions.
Set up the terms of service and privacy policies
The last thing you’ll need to do is add your terms of service and privacy policy pages to your website. These pages are required if you’re collecting any personal data from your visitors (e.g. email address, name, etc.). If you don’t have terms of service or privacy policy pages created yet, I recommend using Termageddon. They’re a legal startup that makes it easy to generate these types of pages.
To add the terms of service page, head over to your pages tab on the WordPress admin dashboard. Create a new page and title it “Terms of Service”. Then paste in the generated Terms of Service from Termageddon. Since WordPress comes with a Privacy Policy page by default, you can click that page and paste your Privacy Policy from Termageddon there.
Bonus: Set up ads.txt for Admob
If you’re using Admob ads in your app, you’ll be required to set up an Ads.txt file on your website. The first step in this documentation states that you need to establish a developer website. We’ve already done just about everything required here, so you can go ahead and check that off our list. The second step is to add your developer website to your app store listing
- For Google Play: Add the website URL in the contact information of your app listing:
- Sign in to your Play Console.
- Select an app.
- On the left menu, click Store presence > Store listing.
- Scroll to Contact Details.
- Add your developer’s website URL.
- For Apple App Store: Add your developer website in the marketing URL field of your store listing.
If you add or update a developer website within your app listing in Google Play, allow up to 24 hours for AdMob to detect these changes.
Add your code snippet to your app-ads.txt file
AdMob offers a code snippet that includes your publisher ID to make it easier for you to set up your app-ads.txt file. Sign in to your AdMob account and click “Apps” and then “View All Apps” on the sidebar. Click the “App-ads.txt” tab and then “How to set up app-ads.txt”. Here, you’re able to copy the code snippet using the copy button. Leave this page open and open a new tab or window.
Jump into your Cloudways application dashboard’s “Access Details” tab and set up a username and password under the “Application Credentials” section in order to access your website via FTP. FTP is a protocol that lets you transfer files from your computer to your website’s server. We’re going to use it to add our app-ads.txt file.
There are a few FTP clients that you can choose from, but I prefer CyberDuck (since I’m on a Mac).
Once you’ve downloaded and installed the program, open it up and fill in the “Host”, “Username”, and “Password” fields with the information from your Cloudways dashboard. Then click “Connect”. A folder should pop up with all of your website’s files. Double click on the public_html folder to open it up, and then create a new file inside of that folder called app-ads.txt.
Copy and paste your code snippet from the window we left open into that file and then save the file. That’s it! You’ve now successfully set up a developer website with ads.txt for your app.
Send traffic to the landing page and monitor the conversion rate
Now that your website is all set up, it’s time to start driving traffic to it to get more app downloads. The best way to do this is by adding a link to your landing page on your app store listing, your social media accounts, and anywhere else you can think of.
Once you start driving traffic to your landing page, it’s important to monitor the conversion rate. This is the percentage of people who visit your landing page and download your app. For example, if you have 100 visitors to your landing page and 30 of them download your app, your conversion rate would be 30%.
If your conversion rate is low, there are a few things you can do to try and increase it:
- Use more eye-catching images on your landing page
- Change the copy on your landing page to be more compelling
- Try a different call to action on your landing page
- Use a different color scheme on your landing page
- Try a different layout for your landing page
Monitoring your conversion rate is important to see if the changes you’re making to your landing page are having a positive impact. If you’re not seeing an increase in your conversion rate, it’s time to try something else. You will not get more app downloads if your conversion rate sucks. Plain and simple.
The most important thing is to keep experimenting until you find what works best for you and your visitors. You will get more app downloads if you cater everything on the landing page to the visitor. There’s no one right way to set up a landing page, so it’s important to experiment and see what gets more app downloads for your app.
How To Create A Landing Page To Get More App Downloads Conclusion
Creating a landing page for your app is one of the best ways to get more app downloads and get more people to use your app. By following the steps in this blog post, you’ll be able to create a landing page that converts and helps you get more app downloads.
Don’t forget to experiment with different images, colors, sales copy, and layouts to find what works best for your app. And always keep an eye on your conversion rate so you can see if the changes you’re making are having a positive impact.
Good luck! I hope this blog post helps you get more app downloads. Remember, if you need any help, we’re always here to support you. Thank you for reading and happy marketing! Did you find this blog post helpful? Leave us a comment below and let us know what you think.

0 Comments